Warp3D Nova: 3D Lighting - Part 1
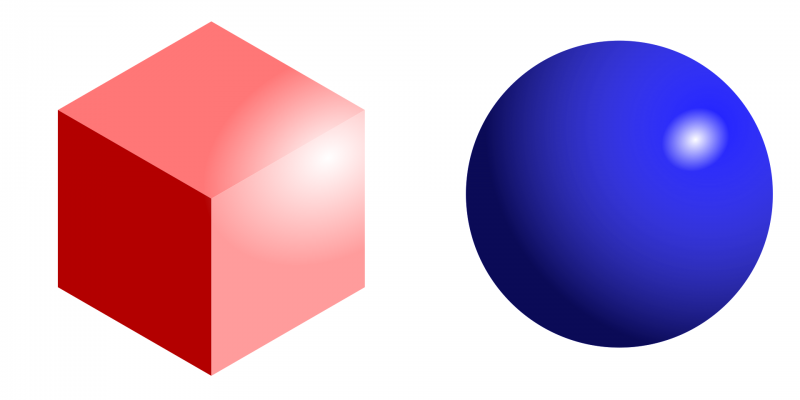
Simulating lighting is critical to realistic 3D rendering. After all, light is what allows us to see the real world. Our first 3D rendering in Warp3D Nova looked pretty flat due to the complete lack of lighting. It's time to fix this by adding light to the scene.
IMPORTANT: 3D lighting calculations involve vector algebra. If you have difficulty with the mathematics, then focus on the concepts behind them.
Lighting Models
In the real world light is emitted by the sun, lights, fires, etc. That light then passes through the air and bounces around as it interacts with objects. Some of those rays of light eventually pass through the lenses in your eyes, which focus them into images on your retinas. Your brain interprets these images, forming a mental picture of the world around you.
Theoretically, you could simulate this process of light bouncing around and interacting with matter in excruciating detail, delivering physically accurate images. That would take huge amounts of processing power, though, so we use approximate lighting models instead. It's possible to generate pretty realistic graphics this way.
Programmable shaders give you great flexibility over which lighting model you use. So, which to choose? We're going to use one called the Phong reflection model.
Phong Reflection Model
The Phong reflection model is fairly old. It isn't based on physics directly, yet produces pretty good images. More importantly, it's fairly easy to understand and implement.
The Phong model divides reflections into three components: ambient, diffuse, and specular. Each approximate different phenomenon. I'm going to cover them in reverse order because I think specular lighting is the easiest to understand.
Specular Reflection
Specular means: "relating to or having the properties of a mirror." So we're talking about shiny surfaces such as mirrors, shiny plastic, metals, etc. A perfect reflector such as a mirror reflects light as shown below. The angle at which the reflected light leaves matches the angle that the light hit the surface.

The surface normal (shown above) is a unit vector pointing directly out of the surface at 90 degrees (i.e., it's perpendicular to the surface). This vector is key to calculating the lighting; neither specular nor diffuse reflections can be calculated without it. "Unit vector" means that the vector has a length of 1.
Of course, not everything is a perfect reflector. With other surfaces the specular reflection may spread out slightly in a cone (see below). Actually, it's more of a fuzzy cone. Light is most intense in the cone's centre and falls off as you move outward.

Mathematically, the specular reflection above is given by the following equation:
is = max(ksi(v·r)ns, 0)
Here:
- ks is the specular reflection constant
- i is the incoming light intensity
- v is the direction (a.k.a., a unit vector) from the surface to the eye/camera
- r is the direction that the light would take in a perfect reflection
- ns is the surface's shininess factor. This controls how narrow (or perfect) the reflection is. The higher the value, the narrower and more perfect the reflection
v·r is the dot-product of vectors v and r. If your unfamiliar with dot products, imagine creating a right-angle triangle using vectors v and r as shown below. The dot-product is the length along r to the triangle's right-angled (90 degree) corner. This is also called the "projection of v on r," but I find it easier to understand visually (see below).

The formula above can't be used directly, as we don't have the reflection direction (r) yet. This is calculated from the normal (n) and light direction (l) vectors as follows:
r = 2(n·l)n - l
The formula above can be derived visually as shown below. Basically, go along the normal vector n by 2(n·l), and then subtract the light vector l; now you have the reflection vector r.

The function max() ensures that the light intensity cannot go negative. "Negative light" means that the light is coming from under the surface, which is invisible. This occurs when n·l < 0.
Diffuse Reflection
An object with a rough surface will scatter light in all directions (see below). This is called diffuse reflection. I'm talking about microscopic roughness too small to see with the naked eye.

The light intensity depends on the angle at which light hits the surface, which is modelled via the following formula:
id= max(kdi(n·l), 0)
kd is the diffuse reflection constant, and id is the reflected light intensity. The other symbols (e.g., n & l) are the same as for the specular reflection formula.
Did you notice that the formula above doesn't depend on the eye/view vector v? That's because light is scattered equally in all directions, so only the surface normal (n) and light position (l) matter.
Ambient Light
The specular & diffuse light equations above handle light hitting surfaces directly from its source. However, light is more complicated than that. Light that bounces off one surface can hit another surface, reflect off that and hit another, and another, etc. This "indirect illumination" affects the final colour we see. We call this ambient light.
The Phong lighting model pretends that this background scattering is uniform across the scene. That's not true in reality. Try the following: put a bright red object like a ball or book on top of a piece of white paper. Now look carefully at the white paper close to the ball. You'll see a reddish tinge. That's reflected red light from the ball hitting the white paper.
Reducing ambient light to a single constant is a quick-n-dirty approximation. It's often "good enough" even if it's technically incorrect. There are techniques to handle ambient light more accurately, but they tend to be complicated and computationally intensive. Look up "Global Illumination" if you're curious. In any case, here's the Phong ambient light formula:
ia= kai
ka is the ambient reflection constant, and ia is the reflected ambient light intensity.
Putting it All Together
Specular, diffuse and ambient reflection's aren't mutually exclusive. Plenty of objects have a shiny outer layer over the top of a diffuse reflecting underlayer. So a surface can have both specular and diffuse reflections. That's how you see a shiny reflection on a red snooker ball, for example. The ambient component is a special case, because it's really a fudge factor to approximate the effect of many interreflections. So, to get the final surface colour, we simply add everything together:
is = max(ksi(v·r)ns, 0) + max(kdi(n·l), 0) + kai
is is the surface colour, as viewed by the eye/camera. Multiple lights can be handled simply by adding the specular, diffuse, and ambient reflections from all lights together.
Final Words
The next task is to turn the lighting model above into shaders. I've run out of time this week so I'll cover that some other time. That's probably a good thing as there is a fair bit of material to get your head around. While you don't need to understand the technical details in order to use the shaders, it certainly helps to know what the code is doing.
As usual, if you have any questions, feel free to contact me or leave them in the comments section below.


Post your comment